Gallery Wall In The Works – Franz Kline

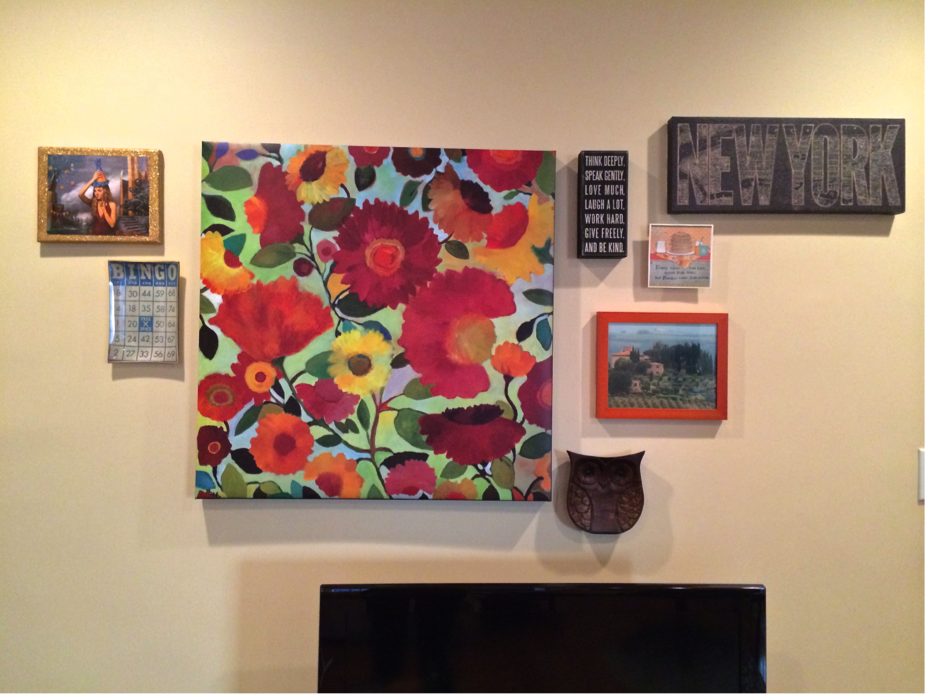
I love gallery walls.  I have been wanting one for a while now, so I have been slowly trying to put one together in my apartment!  Here is my work in progress…

GalleryWall-FranzKline

I was looking at it the other day and was thinking… it needs an abstract piece.  I immediately thought of Franz Kline.  Seeing as I probably can’t get my hands on a real one right now, I thought I could take inspiration from him and create one of my own!

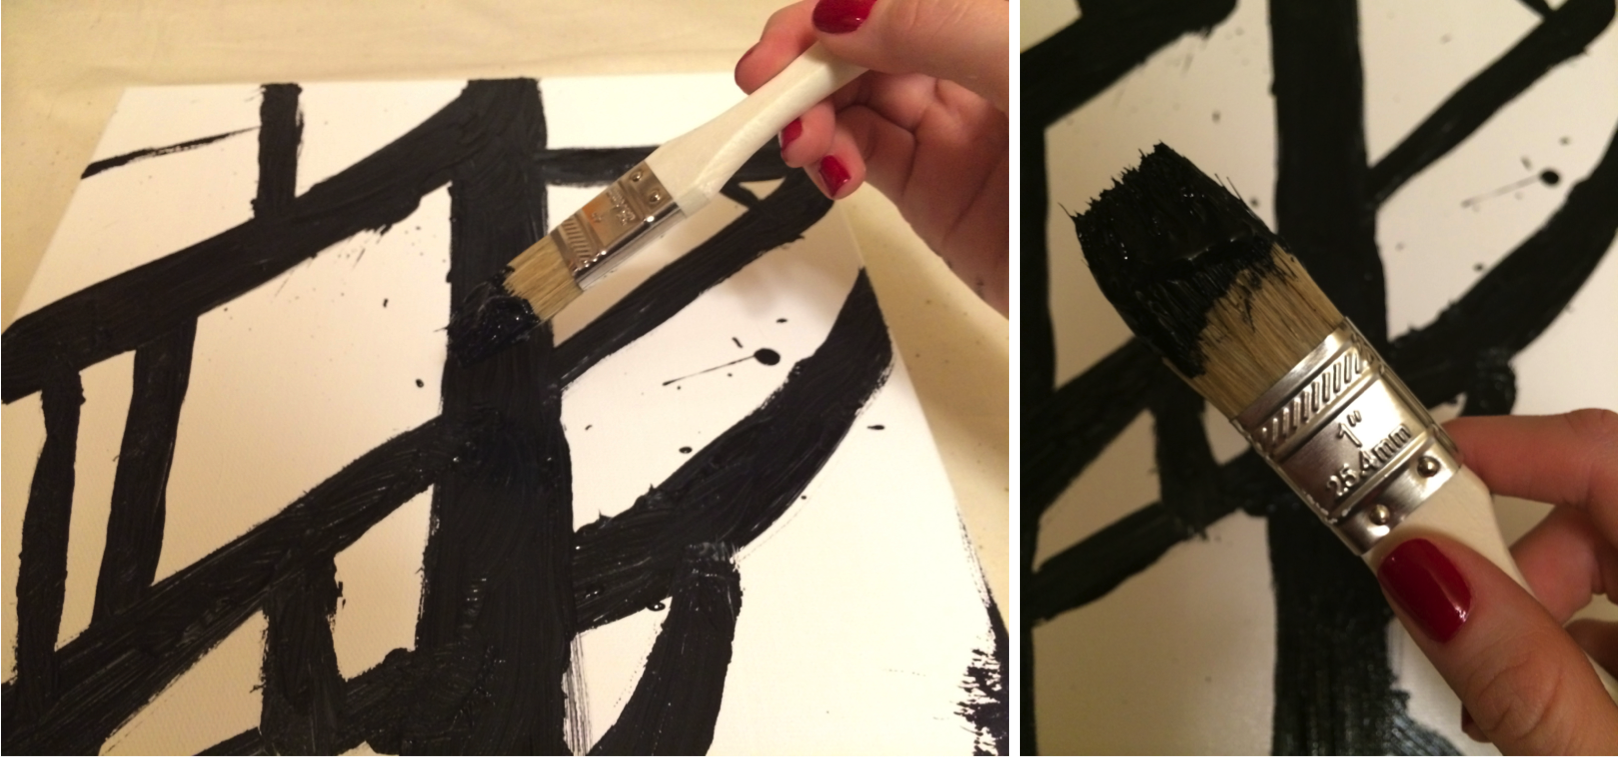
I decided to “Get my Franz on!”

GalleryWall-FranzKline3

I also paid a little homage to one of the other greats with a little splatter… Franz with a dash of Pollock.

GalleryWall-FranzKline6

GalleryWall-FranzKline7

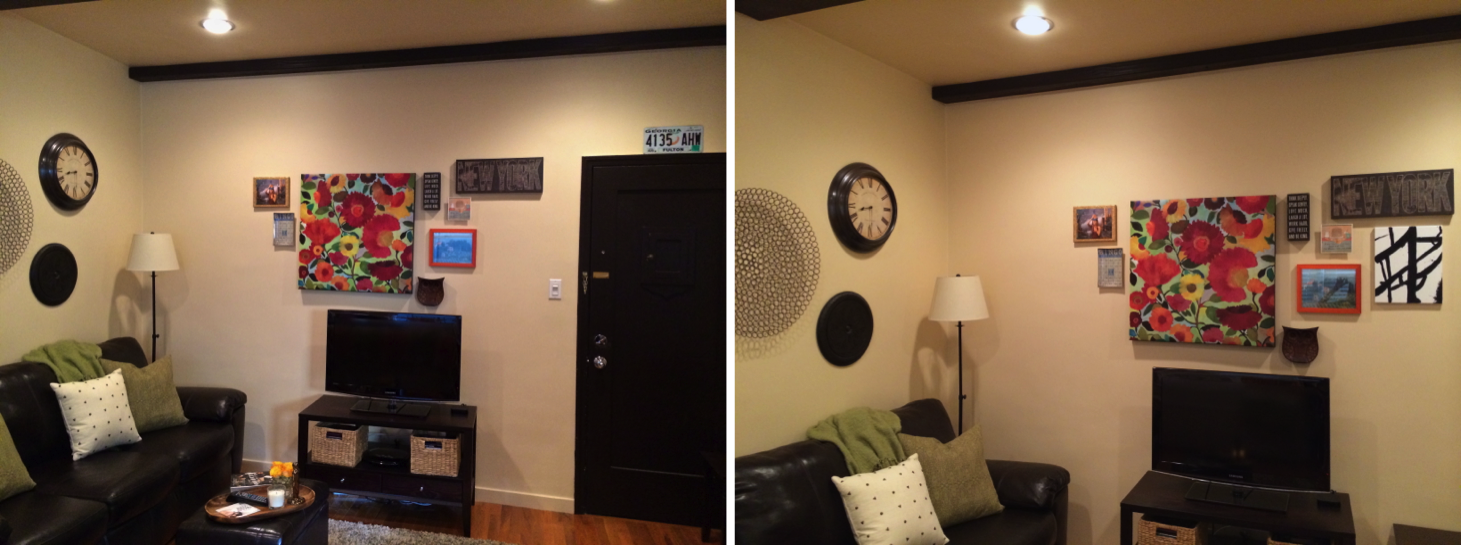
Now, let’s see it on the gallery wall!  (I don’t know what I would do without 3M Command Strips.  It took me two seconds to put on the wall!)

GalleryWall-FranzKline5

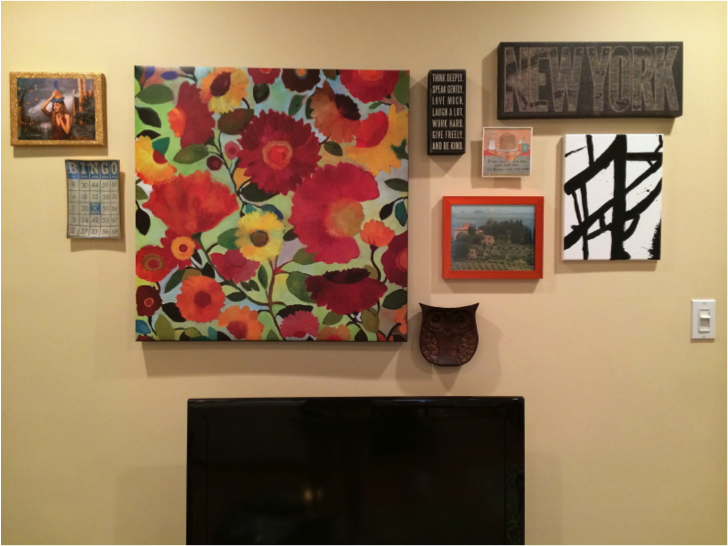
Not too shabby… if I do say so myself.  Now, I think I might need a Black & White print on the left side to balance it out.  I also might change that orange frame.

Here’s the Before & After…

GalleryWall-FranzKline8

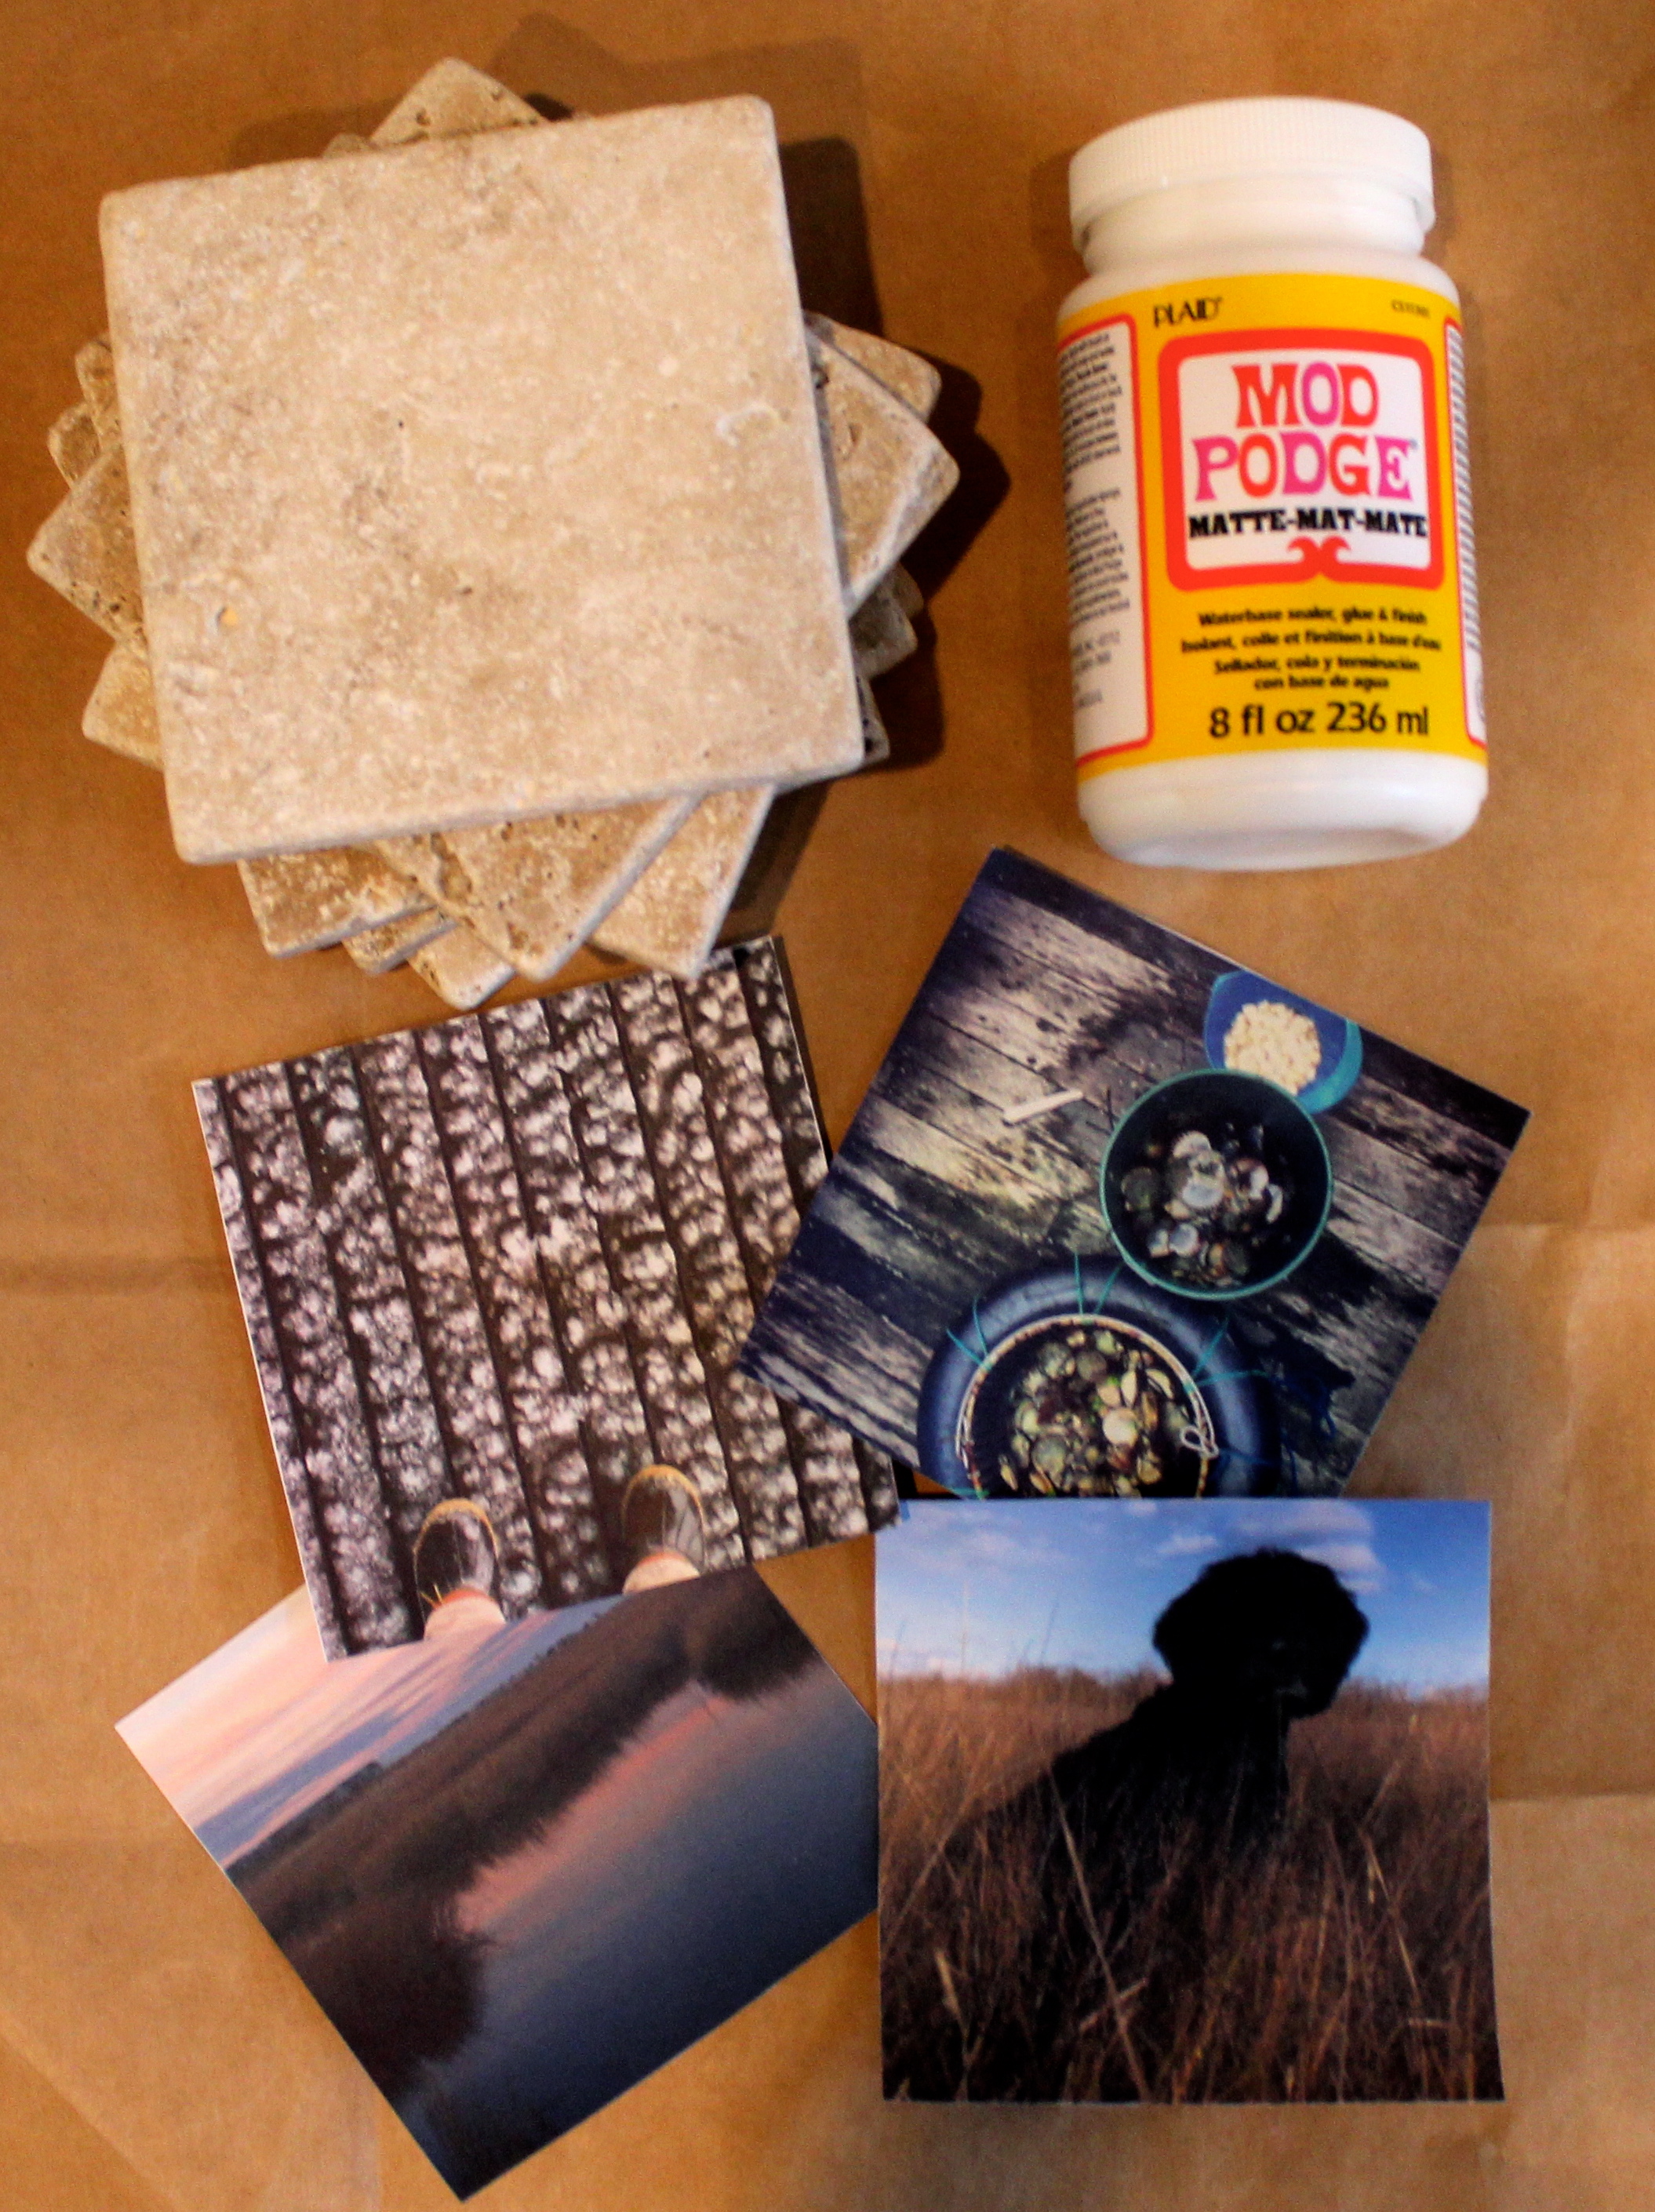
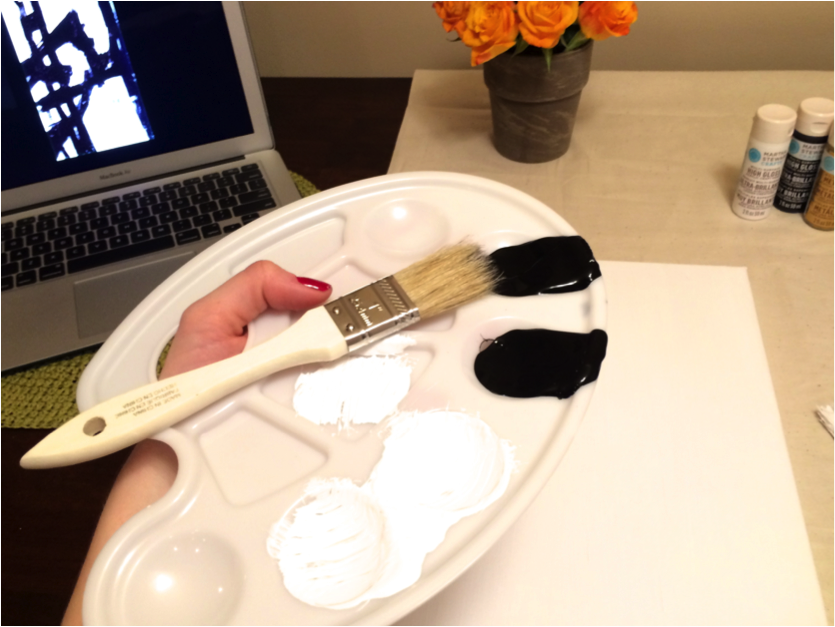
Supplies You Need if you want to get your Franz on…

Blank Canvas (11 x 14), Black paint, White paint, Paint Brushes

Additional supplies: Choose one of his pieces as inspiration and some music that inspires your creativity!  I threw on some Cat Stevens.

Try it!  It was fun!

DIY Instagram Coasters

Are you already  thinking about Christmas presents for next year??  Or for an upcoming birthday or engagement?  Here is an idea for a meaningful, affordable, adorable gift!  I made them this Christmas for my family, and they were a hit!

Remember those supplies I said I got at Home Depot that Bill was driving up to Nantucket??

Well they were for these DIY Instagram Coasters!!

What you need…

1. Tiles from Home Depot (Chiaro Tumbled, Genuine stone – $4 for 9 tiles)

2. Mod Podge

3. Instagram Pictures printed on printer paper but select “photo paper” option when you print. For a 4 x 4 tile… print a 3.68 square to fit perfectly

4. Piece of Sponge

5. Mod Podge Gloss Acrylic Sealer to waterproof the coasters

6. Felt Pads 

InstagramCoasters1

Instructions:

InstagramCoastersInstructions3

Step 1. Spread Mod Podge on the top of the tile.

InstagramCoasterInstruction2

Step 2.  Place the picture on the tile.

InstagramCoasterInstructions

Step 3.  Spread Mod Podge over the picture.

I would cut off the edge of the sponge in between each tile because ink would get on the sponge.

Step 4.  After they are fully dry, spray with the acrylic sealer.  Then let dry. (Step not pictured)

Step 5. Place felt pad circles in all four corners of the tiles.

InstagramCoasters3

Finally, collect a set of four tiles that match, tie them up with a bow and give them to your favorite people!

InstagramCoasters4

A big thank you to Steve for taking the best Instagram pictures ever!  (I used all his shots!)

Halloween Costume Inspiration

At first, I thought it was way too early to start blogging about Halloween!  I mean, it’s still September!!!

Then I went into the store and realized all of the candy was out, everything was orange and black, tinsel kitties ;) and paper ghosts were in the aisles and before you know it, you will be having this conversation the night before that Halloween Costume Party you are attending:

You: “Hey, we have that costume party tomorrow night.”

Spouse or friend: “Oh yea… I forgot all about it.  How is it the end of October already?”

You: “What do you want to go as?”

Spouse or friend: “I don’t know.  Wish we would have planned farther ahead. I guess I will just be a sexy cat again. Next year let’s make sure we think about it prior to the night before so we can be like those “super cool” people who have themed outfits together!”

Have you ever had this conversation or something like it?

Well, I love Halloween!  Mostly because I love coming up with elaborate costume ideas!  Here are some of my favorite halloween costumes my husband and I have come up with over the last couple of years!

BERT & ERNIE

IMG_0683

IMG_0705

VANITY SMURF & BRAINY SMURF

IMG_2624

CHARLIE BROWN & LINUS

IMG_2710

SHERLOCK HOLMES & DR. WATSON

IMG_3035.JPG copy

As you can tell, we go all out creating costumes, especially those masks!

It’s actually easier than you would think!  I will share our secret about how we made these Bert & Ernie masks!

IMG_0034

  What You Will Need:

Large White Poster board, X-ACTO knife, Acrylic Paint, Super Glue and a Velcro strap (That’s it!)

How To Do it:

1.  Cut your poster board in the shape of the characters’ face.

2.  Cut a square for your head somewhere. (We chose to do it in Bert and Ernie’s mouths)

3.  Draw the character’s face.  (Most cartoon characters have fairly standard shapes that make up their face, so even if you don’t consider yourself an artist, you can still do it!

4.  Paint the character’s face.  Acrylic paint from a craft store works great and it is very inexpensive.

5.  Add Hair: We got a black wig from a costume store and cut it up and glued it to the poster board.

6.  Add the velcro strap to the back: Super glue a velcro strap in the back that will go around your head!

7. Have Fun!

Halloween is only a month away, so start thinking NOW about your costume ideas!  It will be here before you know it!

Screen Shot 2013-09-04 at 3.08.47 PM

See you on Tuesdays! ;)